
Want a straightforward nerdqaxe++ setup that packs mining power without the usual hassles?
The NerdQaxe++ has created quite a buzz in the mining community, and with good reason too. This compact home ASIC miner delivers 4.8 TH/s while using just 72 watts of power. Bitcoin mining at home becomes not just possible but practical with this device.
Our complete 30-day test put this miner to work in a real-life home setting. We tracked everything from the original setup to daily operations. The results proved conclusive – the miner’s four BM1368 ASIC chips and standalone capability deliver steady positive returns in today’s market conditions.
The NerdQaxe++ makes Bitcoin mining straightforward and enjoyable, unlike complex, noisy, power-hungry mining rigs. The device’s engineering focuses on home environments, which shows in its stable performance, low rejection rates, and reliable temperature control.
This piece guides you through each step to set up your NerdQaxe++, starting from unboxing to performance optimization. You’ll learn how to update your NerdQaxe++’s firmware and decide if this device matches your mining objectives.
Unboxing and Hardware Overview
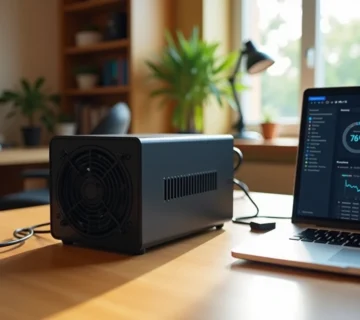
You’ll notice the NerdQaxe++’s compact yet professional design right out of the box. The device is specifically engineered to work in home Bitcoin mining setups.
What comes with the NerdQaxe++
The box contains everything you need to start mining. Your package has the NerdQaxe++ miner unit equipped with four BM1370 ASIC chips, a reliable 12V/10A power supply unit, and a sturdy metal stand. A detailed user manual comes with the unit along with all power cables and accessories that make setup easy.
The device sports a 1.9-inch LCD color screen with two programmable buttons. These let you monitor key metrics like hashrate, Bitcoin price, ASIC temperature, and power usage directly on the device.
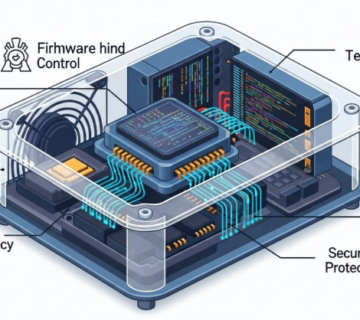
Understanding the BM1370 chips and cooling system
Four BM1370 ASIC chips power the NerdQaxe++. These chips are the same technology used in professional miners like the Antminer S21 Pro. Users can expect the advertised 4.8 TH/s hashrate, with some achieving up to 5.5 TH/s in optimal conditions.
The cooling system stands out as an impressive engineering achievement. A Thermalright AXP90 X36 low-profile cooler pairs with an oversized heat sink and powerful fan. This combination creates excellent thermal management without extra setup requirements. Your device will maintain ideal temperatures during long mining sessions.
Power supply and connectivity options
The NerdQaxe++ uses less power than industrial miners, drawing only 60-80W based on the source. This results in a 15J/TH efficiency rating that helps reduce operating costs.
The device’s connectivity options are flexible. You can choose between 2.4G WiFi and Ethernet. This means you can place your miner anywhere in your home without worrying about cable locations.
The miner’s design follows standard computer mounting hole patterns that work with Intel and AMD processors. This compatibility opens up many customization options for your setup.
Initial Setup and Network Configuration
NerdQaxe++ setup takes about 30 minutes from box to mining – a big plus for crypto mining beginners. You don’t need much technical knowledge to get started with this powerful mining device.
Powering on the device
Start by connecting your NerdQaxe++ to its 12V/6A power adapter. Your device could get damaged if you use any other power supply. The LCD screen will light up and load the AxeOS interface once connected. The device needs about 60W of power, which works fine with regular home outlets.

No comment